
 |
 |
 |
 |
 |
 |
|
DOWNDOG | EAGLE | COBRA | HERO | HALF MOON | CORPSE | GATE
TRIANGLE | PEACOCK | LOCUST | COBBLER | SHOULDER STAND HEADSTAND | BRIDGE | CAMEL | COW FACE | UP BOW | INVERTED STAFF SEATED WIDE ANGLE | HEAD TO KNEE | TORTOISE | DANCER NOOSE  |
| Salamba Sarvangasana ~ Supported Shoulderstand Images by Nancy Van Kanegan Shoulderstand requires a lot of flexibility in the neck and shoulders. Therefore it's best to first warm up with shoulder rolls, spine flexes, forward bends, twists and perhaps a sun salutation. If you have injuries or structural problems in the neck or shoulders, you'll want to avoid this pose and instead try an alternative. These include half shoulderstand (hips resting in the hands with legs extended overhead at an angle), tranquillity pose (balancing on the upper back and shoulders with the legs overhead and supported by extended arms), or viparita karani (lying with the hips raised on a block or bolster and legs extended up against a wall). Also, because it is a rather strong inversion, shoulderstand is contraindicated if you have high blood pressure, heart problems, or eye problems like glaucoma or a detached retina. And you should not do this pose while menstruating or if you feel uncomfortable pressure in the head, ears, eyes or chest while practicing it. If you're new to shoulderstand or tight in the neck and shoulders, you'll find it helpful to practice with the shoulders elevated a few inches off the floor. You can do this by using two or three stacked blankets, gym pads, or other broad yet firm surface that's at least as wide as your shoulders and deep enough so your elbows fit on it too. This will cause less stress on the neck, help you to keep both the shoulders and the elbows grounded, and make it easier to lift the neck vertebrae (especially C7 - the knobby bone at the base of the neck) and thoracic spine away from the floor. This in turn will enable you to better align the shoulders, hip joints and ankles in a vertical line, and that will enable you to hold the pose longer with less strain. Beginners will find it best to ease into this pose by working with a wall. Lie on the floor with your legs up the wall and your sitting bones against it. Note where your shoulders are. Then stack your blankets or pad so the front edge is the same distance from the wall as your shoulders. I like to sandwich my mat between or under the blankets then over the top so I have a smooth edge where my neck will be and a non-slip surface to keep my arms and elbows in place. You might want to put a towel under your head rather than a sticky mat to provide more comfort and to keep the head from getting stuck and jamming the neck as you lift up. Once you've set up your "launching pad," lie on it so your shoulders are on the support but the back of the head is off it, and have the soles of your feet on the wall. Pull the shoulders a bit away from the hips so they are level, not sloped down, and at the edge of the raised mat. Lift the hips a bit, extend the arms (interlacing the fingers if you can), roll the shoulders under and wriggle the shoulder blades toward each other. With an inhale, tuck the pelvis, press the feet into the wall, push your arms down and lift the hips up until they are above the shoulders. Walk the feet up the wall to where the shins are parallel to the floor. Keep stretching the tailbone up, lifting through the torso, rooting the shoulders down, and lifting the cervical vertebrae away from the floor as the top of the breastbone comes toward your chin. Take three to five deep breaths, then lower the hips down. If that felt ok, you can take it up a notch. Otherwise, try lifting the hips less high next time and hold there for a few breaths, or do one of the alternative poses suggested above. If you're going further, after you lift the hips to vertical as before, walk the feet up the wall until the legs are quite straight. Press the toes into the wall and lift the heels away as you stretch the tailbone toward the toes. Bend the elbows and bring the palms of the hands to your back with the fingers pointing up, taking care to keep the elbows from splaying out. Press the upper arms down evenly from shoulders to elbows and keep lifting the spine as you relax the neck and draw the palette (roof of the mouth) back away from the chin. Hold for five to eight breaths, then release the hands and lower the hips. After a few resting breaths, if you feel like going on, check your position on your base to make sure everything is where it should be. Then lift up and align as you did the first time you went up, with the shins parallel to the floor. Bring the hands to the back, keeping the elbows in line with the shoulders (you can use a strap around the upper arms if you can't keep the elbows from splaying). Keeping a strong lift through the spine, take one foot away from the wall and extend it straight up. Make sure you keep pulling the abdominals in and rooting the tailbone in and up to keep the pelvis from tipping backward. Contract the buttock and thigh muscles to lift the back of the pelvis up. Then extend the other leg up. Let the legs separate a bit and turn them strongly inward (inner thighs rolling to the back of the legs), then stretch the tailbone up and squeeze the inner thighs together. Keep stretching up strongly through the spine, hips, inner legs, heels and balls of the feet - keep launching your "rocket" - as you ground down through the shoulders and elbows. After eight to ten deep breaths, bend one knee at a time to bring the feet to the wall, then release the hands and lower the hips. Roll off your base to the right side, and rest for a few breaths. Once you're comfortable holding shoulderstand for a minute or two (10 to 20 breaths), you can try getting into it away from the wall. Position your launching pad farther away from the wall, lie on it with the shoulders aligned as before, lift the feet off the floor, then flip them up over your head as you lift the hips up so your legs hang back over your face in an easy plow pose. Interlace your fingers and roll the shoulders under, then bring the hands to your back, and "launch your rocket" by lifting your feet up to the sky. Keep grounding down into your base and lifting up through the torso and legs as you work the upper arms toward each other. The upper palette in the mouth is the energy center for sarvangasana. So as you draw the palette back and work the pose, you might want to think of yourself as a fountain shooting energy back up from the roof of the mouth and out the soles of your feet. Because shoulderstand compresses the front of the throat and upper chest, it's advisable after you've held the pose a while to do a counter pose to open those areas. Fish pose (matsyasana) is typically done after sarvangasana. A simple version of fish is to lie with the feet extended, lift the hips a bit, and place the hands palms down under the buttocks. Then, keeping the legs strong, press into the elbows and lift the chest and head up. Drop the head back to open the throat, then ease the head back and down so you are pressing into the back or top of the head, your elbows, and sitting bones as you open your heart center to the heavens. After five to ten breaths, lift the head a bit, tuck the chin, and lower back down to lie flat. Alternatively, you can sit in an easy cross-legged position, place your hands behind your hips with the fingers pointing forward, arch the chest up and stretch the head back. Or you can come into an easy forward bend, place your hands on the shins, and lift the head up as you pull the shoulders back and the chest forward. Because shoulderstand is so calming, it's great to then lie back in savansana (corpse pose), rest, and let the healing benefits of this soothing pose take effect. Text by Tim
Noworyta |
||
|
E-mail: info@yogamind.com | Return Home :: mindfully designed by braddon.com :: |
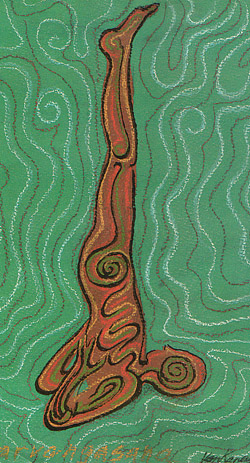 Sarvangasana literally means "all limbs pose," and that says a lot about what's involved in doing this wonderful inversion. While the shoulders and arms provide the base, you need a strong upward thrust of energy through your legs and core to lift fully into shoulderstand. For this reason you might think of it as "rocket-launcher pose." The benefits of sarvangasana are so many it could also be called "The Great Healer." This pose stretches the neck, shoulder and upper back muscles, strengthens the legs and upper body, and opens the chest. It increases circulation to the head and upper chest while draining used blood and toxins from the legs, pelvis and abdominal area. Consequently it helps treat colds, digestive problems, menstrual disorders and respiratory ailments. Shoulderstand stimulates the parasympathetic nervous system, which slows the heartbeat and calms the mind. So it counteracts nervousness, tension headaches and insomnia. And this asana has a special connection with the visuddha or throat chakra, where the thyroid and parathyroid glands are located. By promoting the balanced functioning of these glands, which control metabolism and hormonal activity, salamba (supported) sarvangasana gives you a calm energy that nourishes body and soul. For this reason, it is known as the "Mother" pose, the Queen of the asanas. Whenever you need a lift, put yourself in this healing inversion and let the Great Mother take care of you.