
 |
 |
 |
 |
 |
 |
|
DOWNDOG | EAGLE | COBRA | HERO | HALF MOON | CORPSE | GATE
TRIANGLE | PEACOCK | LOCUST | COBBLER | SHOULDER STAND HEADSTAND | BRIDGE | CAMEL | COW FACE | UP BOW | INVERTED STAFF SEATED WIDE ANGLE | HEAD TO KNEE | TORTOISE | DANCER NOOSE  |
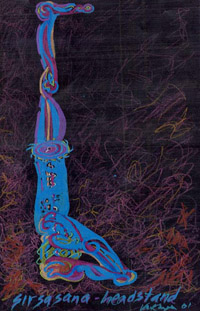
| Salamba Sirsansa ~ Supported Headstand Images by Nancy Van Kanegan Since headstand is such a strong inversion, it's best to be warmed up (but not tired) and to prepare for it by first doing a less intense inversion, such as downward facing dog (adho mukha svanasana) or dolphin pose (hands in headstand position, head on the floor, hips lifting, but toes still on the floor). Headstand is contraindicated if you have high blood pressure, or problems with the heart, neck, or eyes, including glaucoma or a detached retina. And you should not do this pose if you are menstruating or feel pain in the neck or uncomfortable pressure in the head, ears, eyes or chest while practicing it. Begin on your hands and knees. If you're new to the pose, you might want to practice near a wall to reduce the fear of falling forward over your head. With the palms turned up and forearms parallel, place the hands and forearms on a sticky mat or towel so they don't slide apart and there is some padding for your head. Make sure your elbows are directly beneath your shoulders (many people start with the elbows too wide) and in line with each other. Interlace the fingers tightly (right up to the webbing) and bring whichever little finger is on the bottom in to be parallel with the other little finger, so it doesn't get crushed. Let the tips of the thumbs touch each other. Place the crown of the head (just in front of the bump at the top of your skull) on the floor, with the back of the head against the thumbs. Make sure the bones of the wrists are on top of each other, and that the wrists are not rolling in or out. This is the base of your pose. Before you go further, lift the triceps and pull the shoulders vigorously up away from the ears and back as you bring the heart forward. Hollow the armpits by pulling them toward the hips and bring the shoulder blades toward each other as you dig their inner edges into the back. Keep this action going in the arms and shoulders the whole time you're in the pose. Lift the knees, straighten the legs and walk the feet in toward the elbows until your torso is as vertical as you can get it. When you go up into the pose, you'll want to have your weight distributed about two-thirds into the arms and one-third into the head (even less if you're just starting out), so keep pressing the inner elbows, wrists and fingers down as you lift the shoulders up. Stretch up strongly through the spine and hips, then pause. Check to make sure you haven't splayed the elbows, dropped the shoulders or rounded the upper back. If you like, you can stop here and hold for a few breaths, then drop the knees, stack the fists under your forehead (to get the head above the heart), and rest back in child's pose. Or you can stay in position, energize the legs, and try to lift the toes a bit off the floor a few times - even if it's only for a second - then come out and rest. You might want to repeat this preparation a few times until you're comfortable with it. If you feel ready to lift into the pose, come to where the torso is vertical and your toes are on the floor. Maintain the lift through the torso and hips, bend the knees, and with an inhale lift the feet up to where the thighs are horizontal. Then continue raising the thighs to vertical, with the feet hanging back toward the hips. Keeping the arm and shoulder actions mentioned before, contract the abdominal and buttock muscles, take the kidneys back and bring the tailbone in and up to stretch through the lumbar spine. To avoid arching the lower back, pull the ribs in toward the spine while you bring the spine in and up. If this is enough for you, release after four or five breaths, bringing the knees toward the chest and the feet to the floor so you can come down and rest in child's pose. If you want to go all the way, stretch the legs up, soles of the feet toward the sky. Rotate the thighs inward, take the groins back, and bring the tailbone and sacrum forward. Squeeze the thighs together and stretch up vigorously through your core, from the top of the head up through the spine and inner legs, then out the heels and balls of your feet. Shoot a stream of energy up like a fountain from the upper palate of your mouth (the energy focal point in this pose) as you ground down through the arms and head. Let your gaze be soft, looking at the floor or just past the tip of your nose. Keep the ankles, knees, hips and shoulders in line. When you find the right alignment and balance, you'll feel light and easy in the pose. Hold for five to eight breaths, then come down and rest in child's pose. Eventually, you'll want to hold the pose a minute or two (10 to 20 breaths) and even longer. And once your back muscles get strong, you'll be able to lift up and come out of the pose with straight legs. When that becomes easy, you can begin to experiment with the many variations of headstand, such as that with the legs opened wide to the side (upavista konasana), with the soles of the feet together (baddha konasana), or with one leg extended forward and the other back (hanumasana). (See Iyengar's Light on Yoga for more about headstand variations.) When you're upside down in headstand, it can be difficult to know whether you're aligned properly in the pose. So it helps to have a practice partner or teacher give you feedback. You can also practice in a corner so you'll learn if you're tilting to one side or another, dropping the shoulders, or arching the back. Because sirsasana is so stimulating and requires a strong contraction in the neck and shoulder muscles, it's advisable to practice shoulderstand after you do headstand. Shoulderstand helps to calm the nervous system and release the neck and shoulder muscles, so you'll be feel more balanced and happy, instead of tight and firey. Like Shiva and Shakti, headstand and shoulderstand are a divine couple whose union produces the fullness of being. Give homage to the king and queen of asanas, and they will bestow great blessings upon you. Text by Tim
Noworyta |
||
|
E-mail: info@yogamind.com | Return Home :: mindfully designed by braddon.com :: |
 Aahhhh!
Hail Headstand, King of the Asanas! This pose is truly majestic. By reversing the flow of blood and lymph in the body, it floods the brain with oxygenated blood, stimulating the nervous system and clearing the mind. This also activates the pituitary and pineal glands in the head, which rule the endocrine system that controls the body's chemical and metabolic processes, thereby improving mental and physical functions. By draining venous (used) blood from the legs, pelvis and lower torso, headstand rejuvenates those areas. And by reversing the pull of gravity on the organs, especially the intestines, it helps to cleanse them and overcome problems of the liver, kidneys, stomach, intestines and reproductive system. Sirsasana increases gastric fire and produces heat in the body. Mentally, it helps us overcome fear and develop focus - if your mind wanders in this pose, you'll be out of it in a flash. Structurally, it strengthens the back, legs, shoulders, arms, diaphragm and abdominal muscles. When done properly, headstand helps the spine become properly aligned, improving posture, facilitating good breathing and reducing muscular stress. In other words, it's very good for you! Practice it daily, and you'll feel positively royal.
Aahhhh!
Hail Headstand, King of the Asanas! This pose is truly majestic. By reversing the flow of blood and lymph in the body, it floods the brain with oxygenated blood, stimulating the nervous system and clearing the mind. This also activates the pituitary and pineal glands in the head, which rule the endocrine system that controls the body's chemical and metabolic processes, thereby improving mental and physical functions. By draining venous (used) blood from the legs, pelvis and lower torso, headstand rejuvenates those areas. And by reversing the pull of gravity on the organs, especially the intestines, it helps to cleanse them and overcome problems of the liver, kidneys, stomach, intestines and reproductive system. Sirsasana increases gastric fire and produces heat in the body. Mentally, it helps us overcome fear and develop focus - if your mind wanders in this pose, you'll be out of it in a flash. Structurally, it strengthens the back, legs, shoulders, arms, diaphragm and abdominal muscles. When done properly, headstand helps the spine become properly aligned, improving posture, facilitating good breathing and reducing muscular stress. In other words, it's very good for you! Practice it daily, and you'll feel positively royal.